
Auth0
Using Auth0 with Internal
With our OAuth2 flow, anyone can make use of their existing Auth0 API/App to make their Spaces more secure by limiting access to those who have authenticated via Auth0.
Getting the Correct Information Into and from Auth0
You'll need to collect a few items from your Auth0 application and add some information. This next bit will end with you having all of the information you need to set up an Auth0-protected Data Provider for your Spaces.
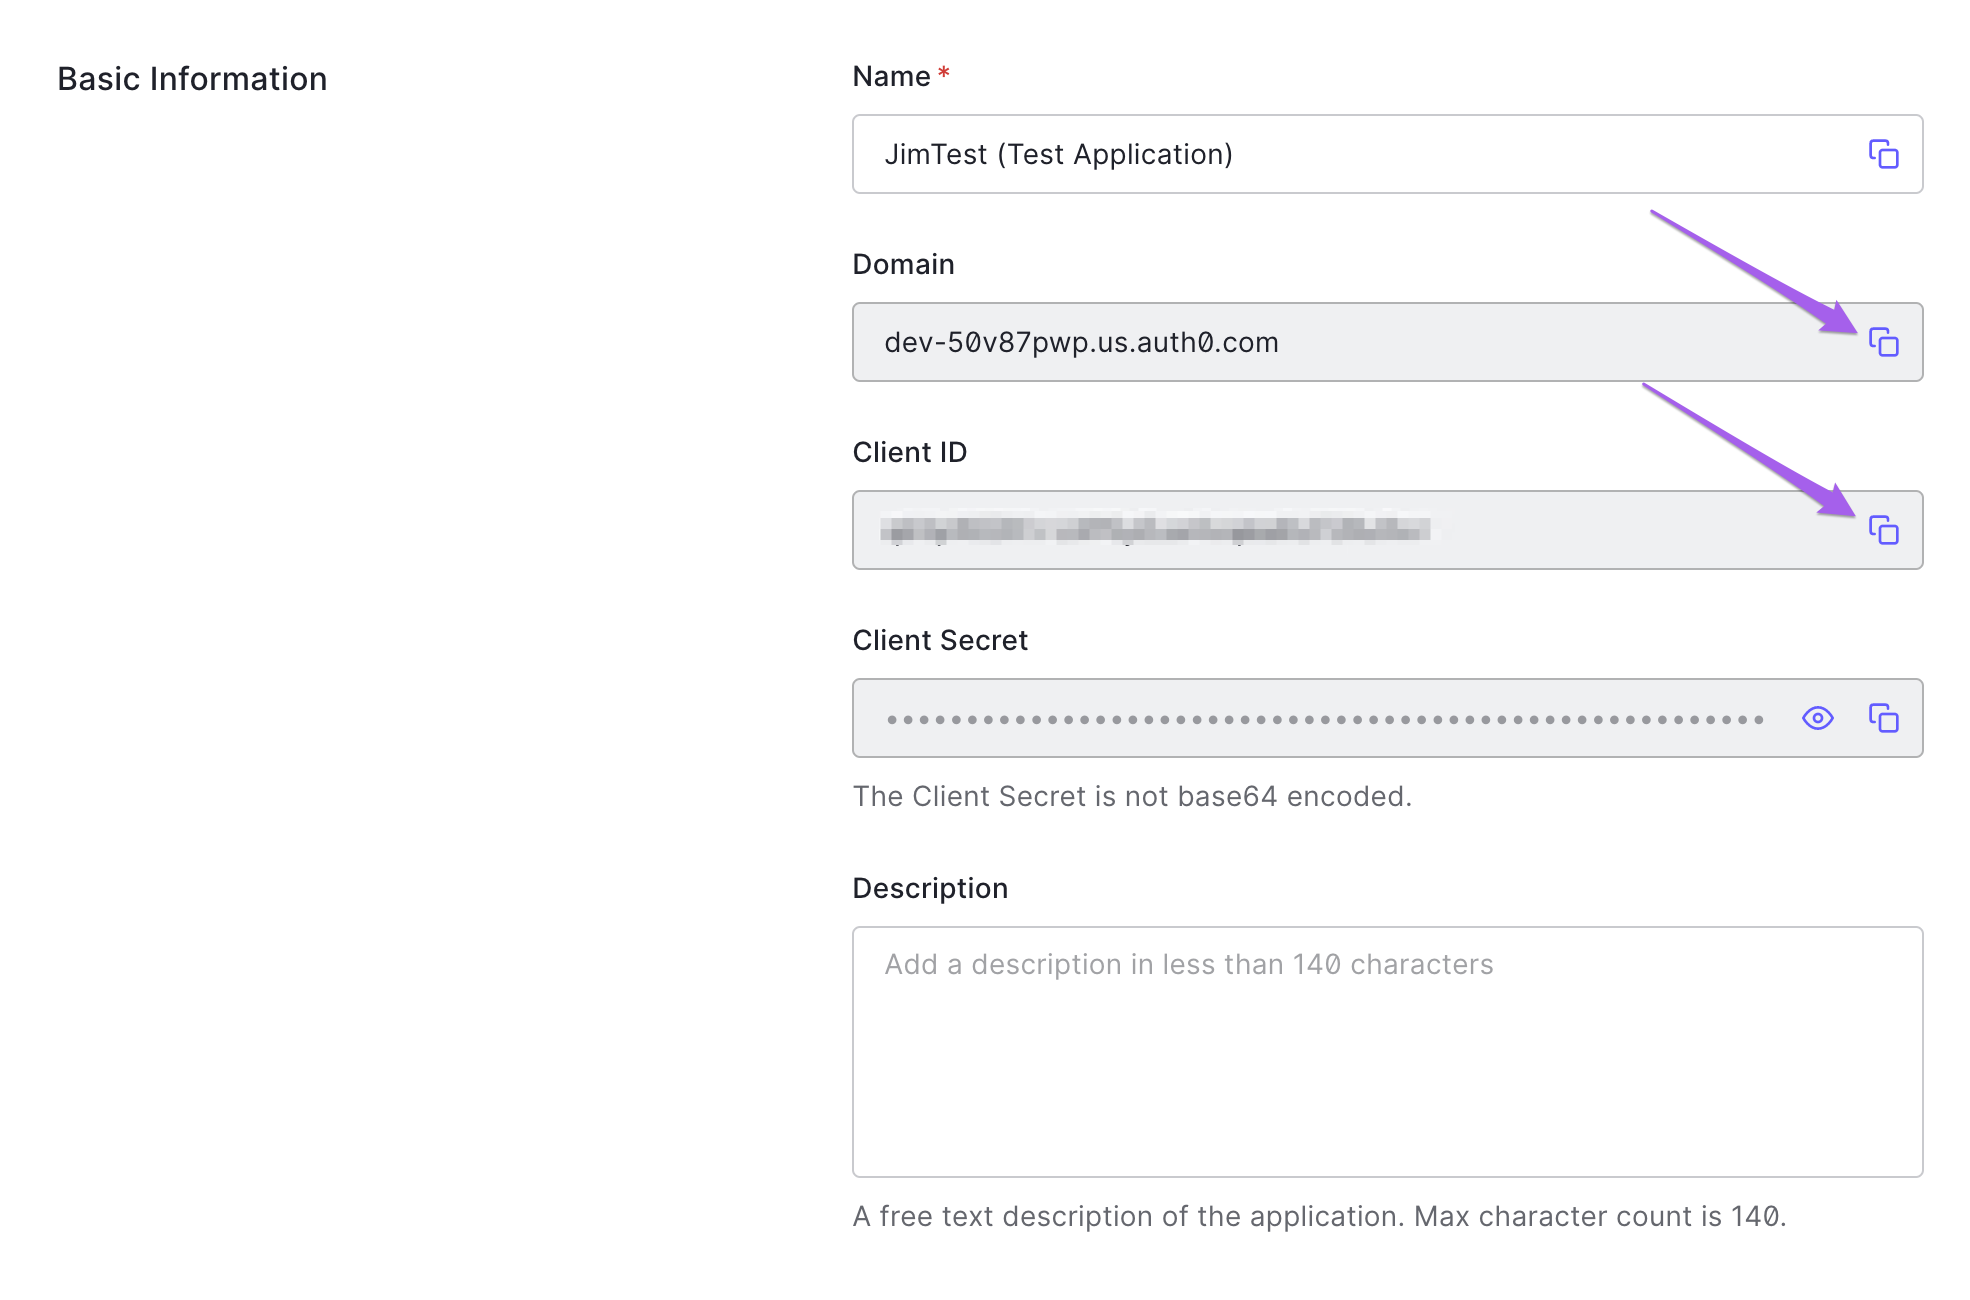
1. Collect Your Application's Client Secret & ClientID
Please, note that your ClientSecret is very sensitive and should not be publicly exposed
From your Auth0 dashboard, find the left nav. Therein, click "Applications" and then the second link labelled "Applications." In the "Basic Information" section, copy the Client ID and Client Secret and store them for later use.
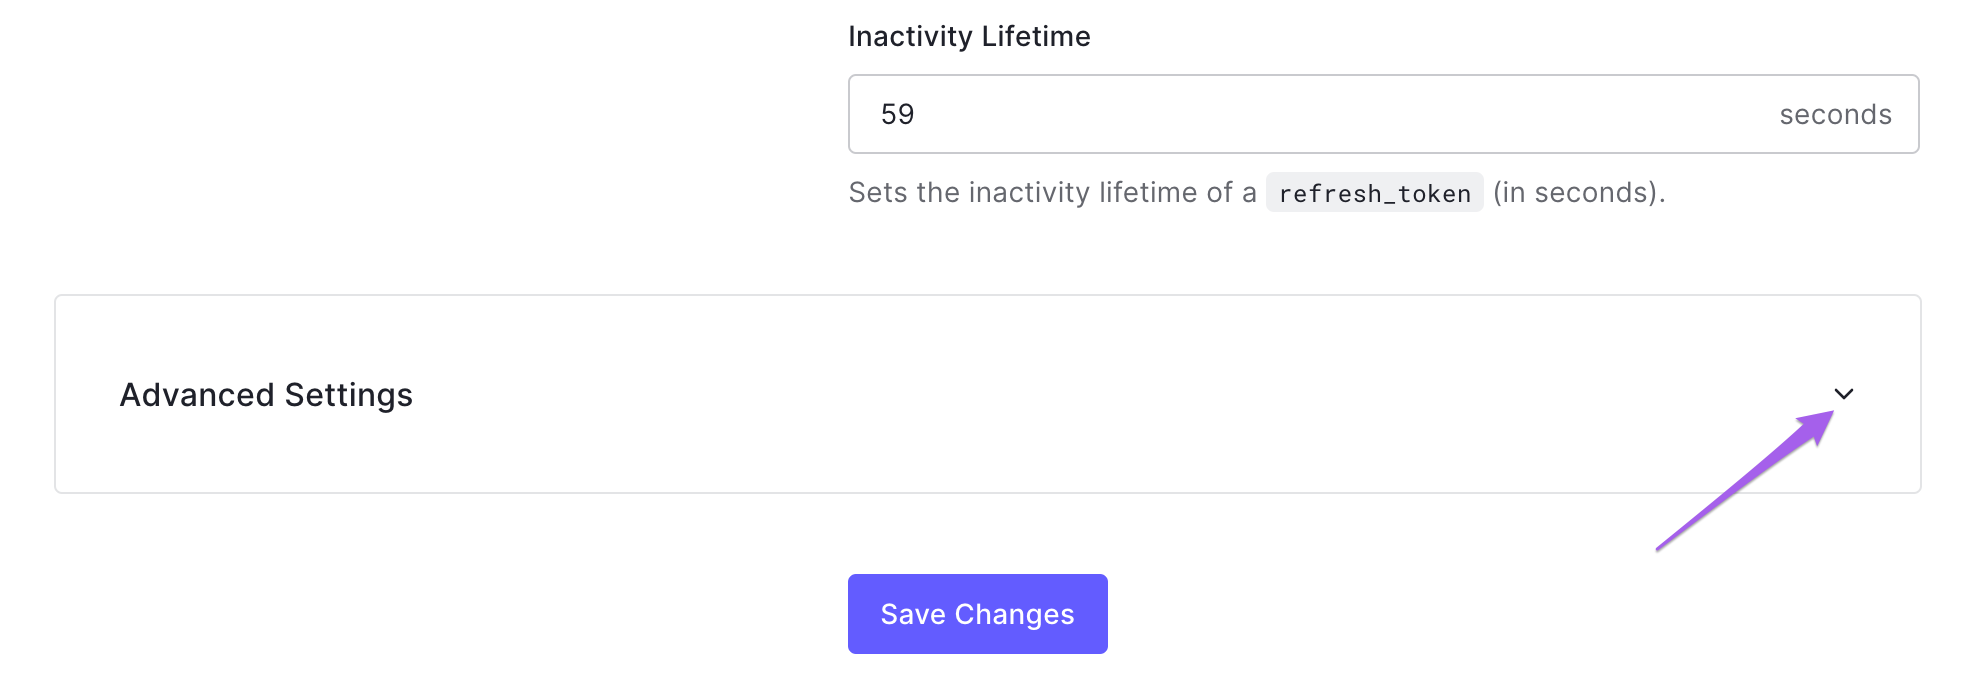
2. Get Your App's Authorization and Token URLs
In the same settings menu, scroll to the bottom and click the carat in the "Advanced Settings" CTA.
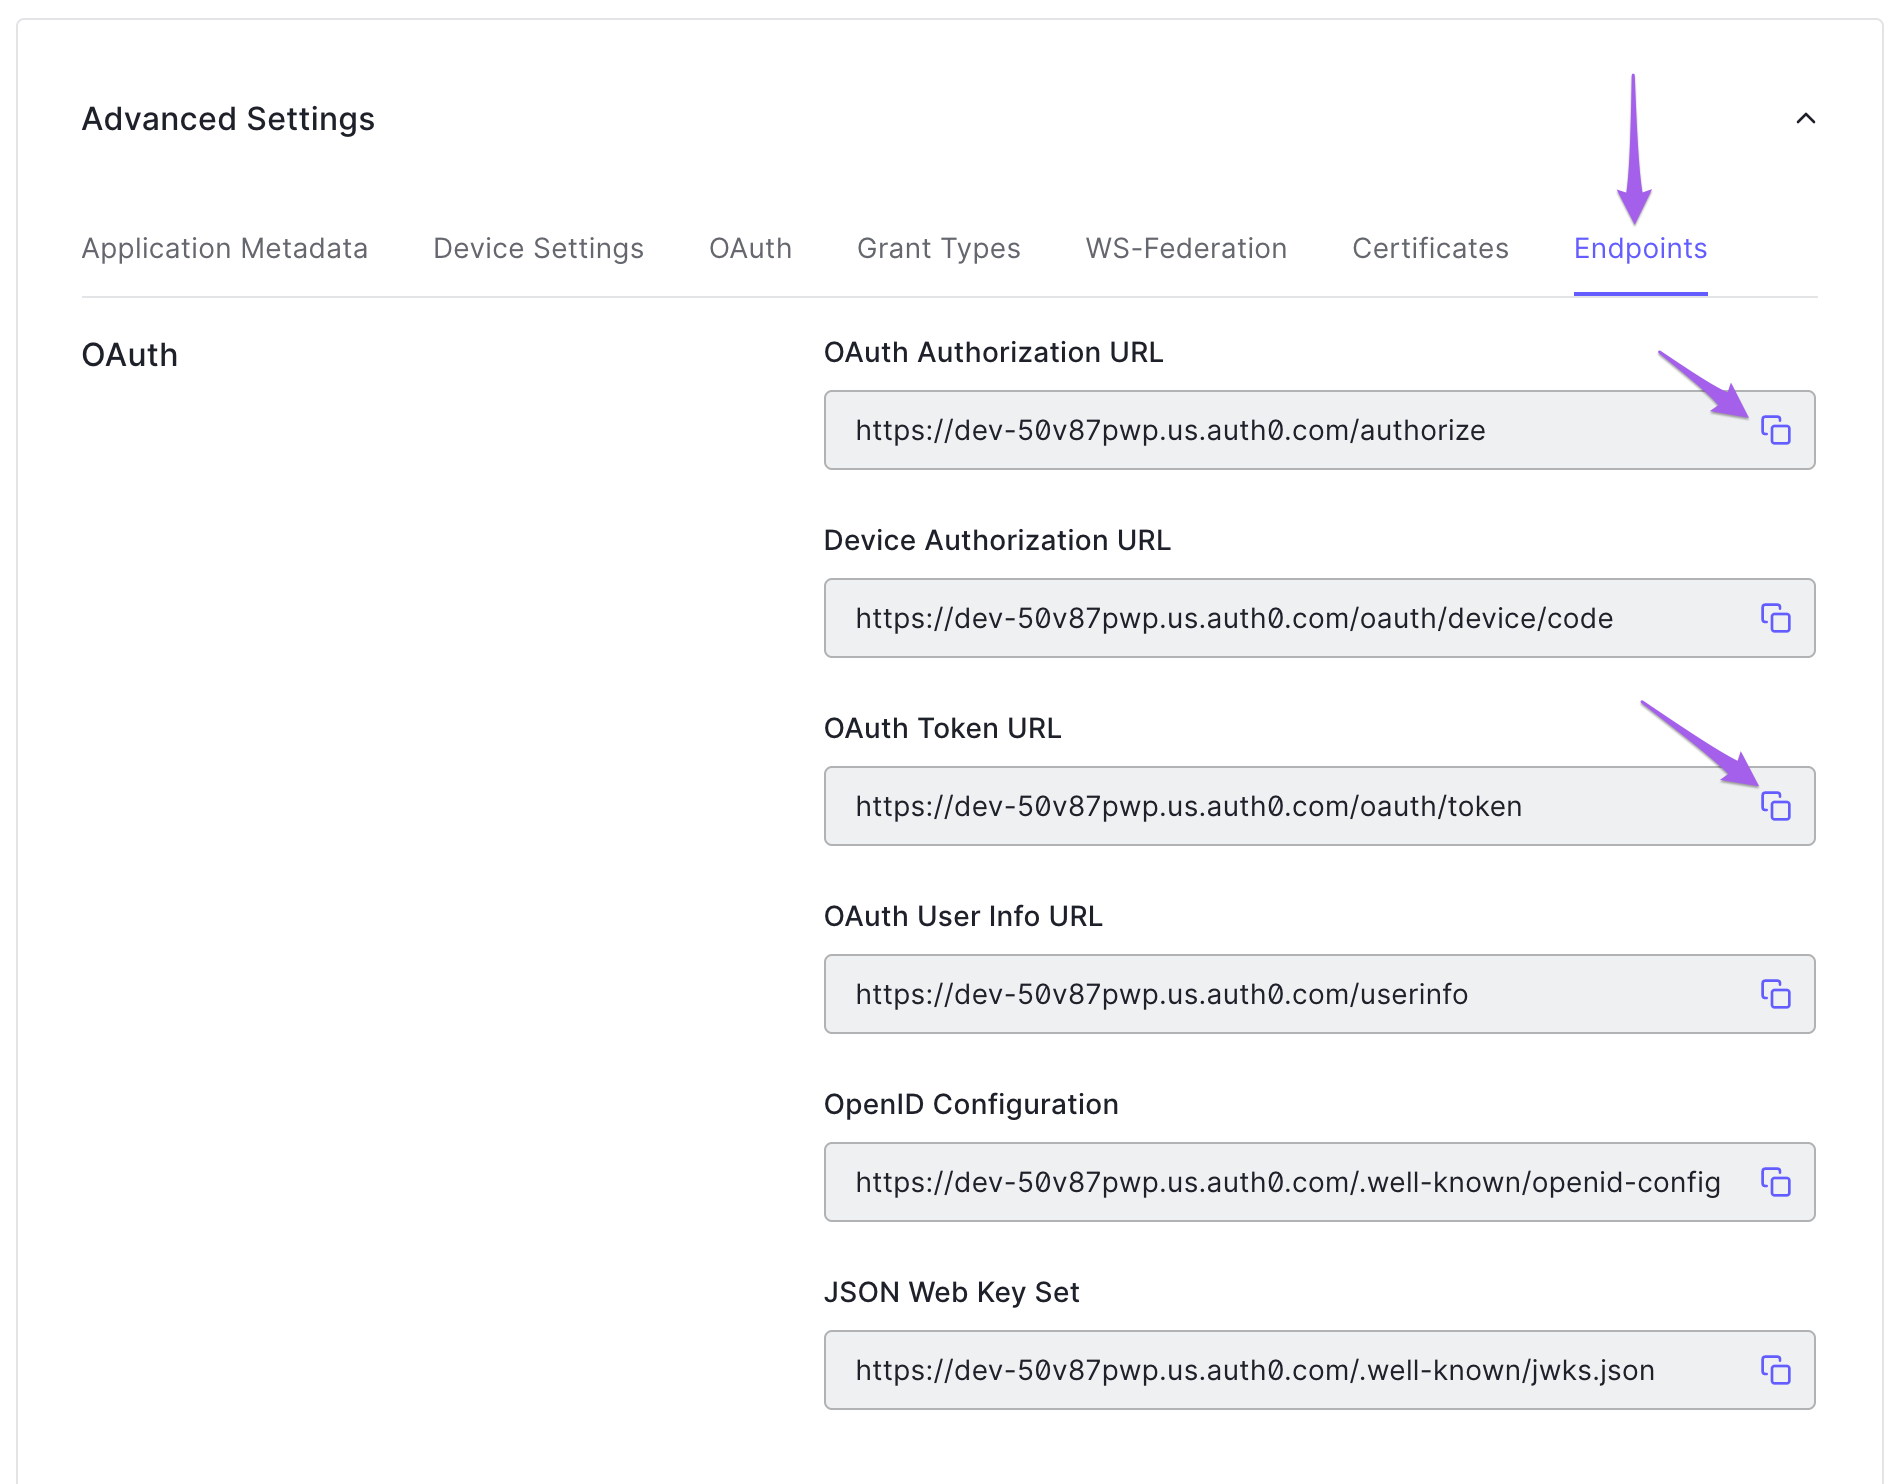
From there, you'll click "Endpoints" and then copy the OAuth Authorization URL and the OAuth Token URL and paste them somewhere you'll be able to find them later.
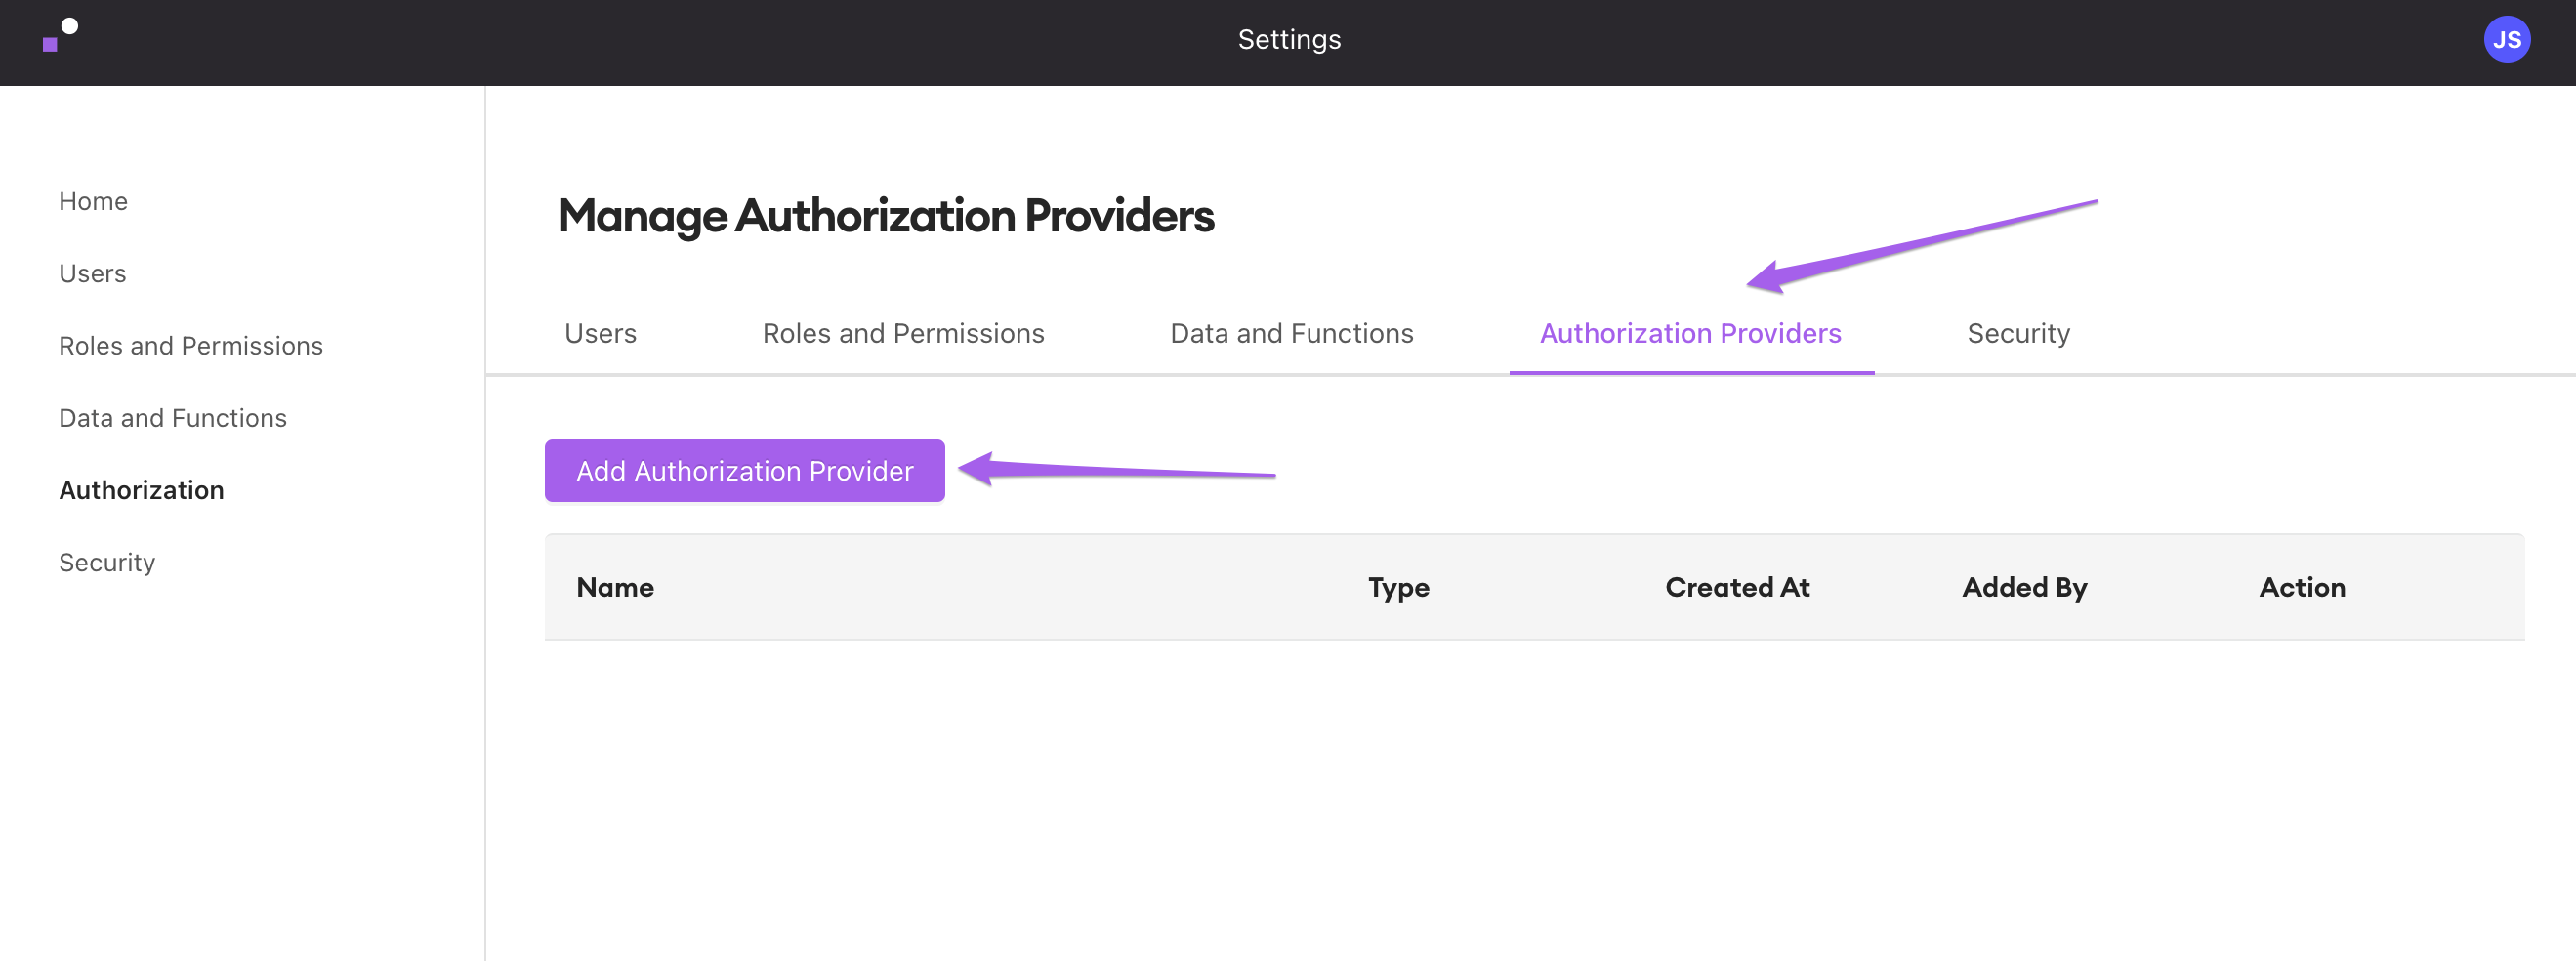
Setting Up the Authorization Provider in Internal
1. Add a New Provide
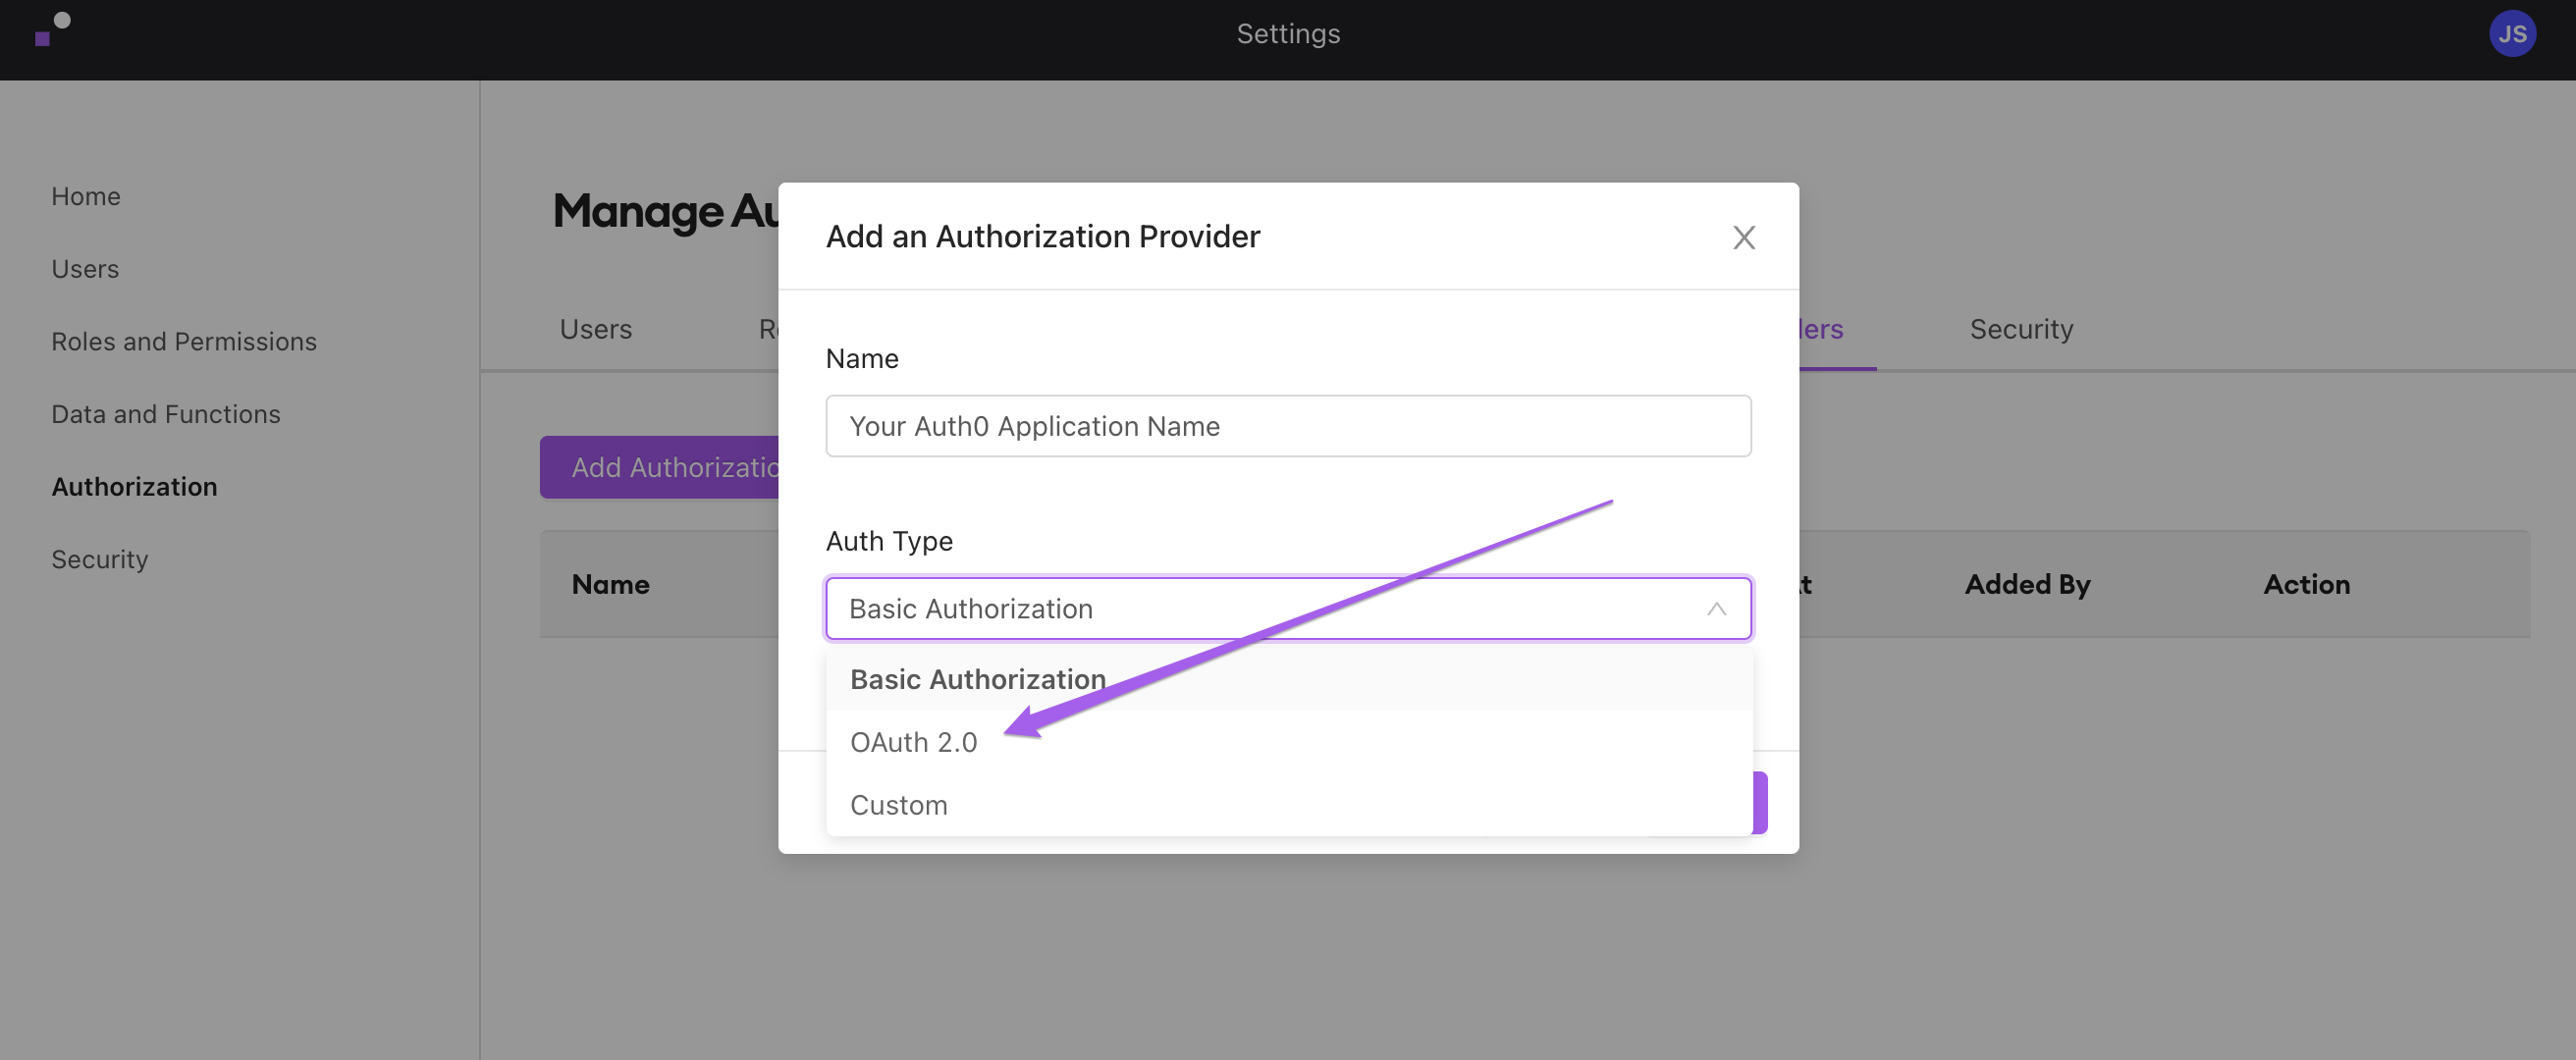
Back in Internal, navigate to Company Settings. Click "Authorization Providers," and then click "Add Authorization Provider."
In the resulting popup, select "OAuth 2.0" and enter a name for your Auth Provider.
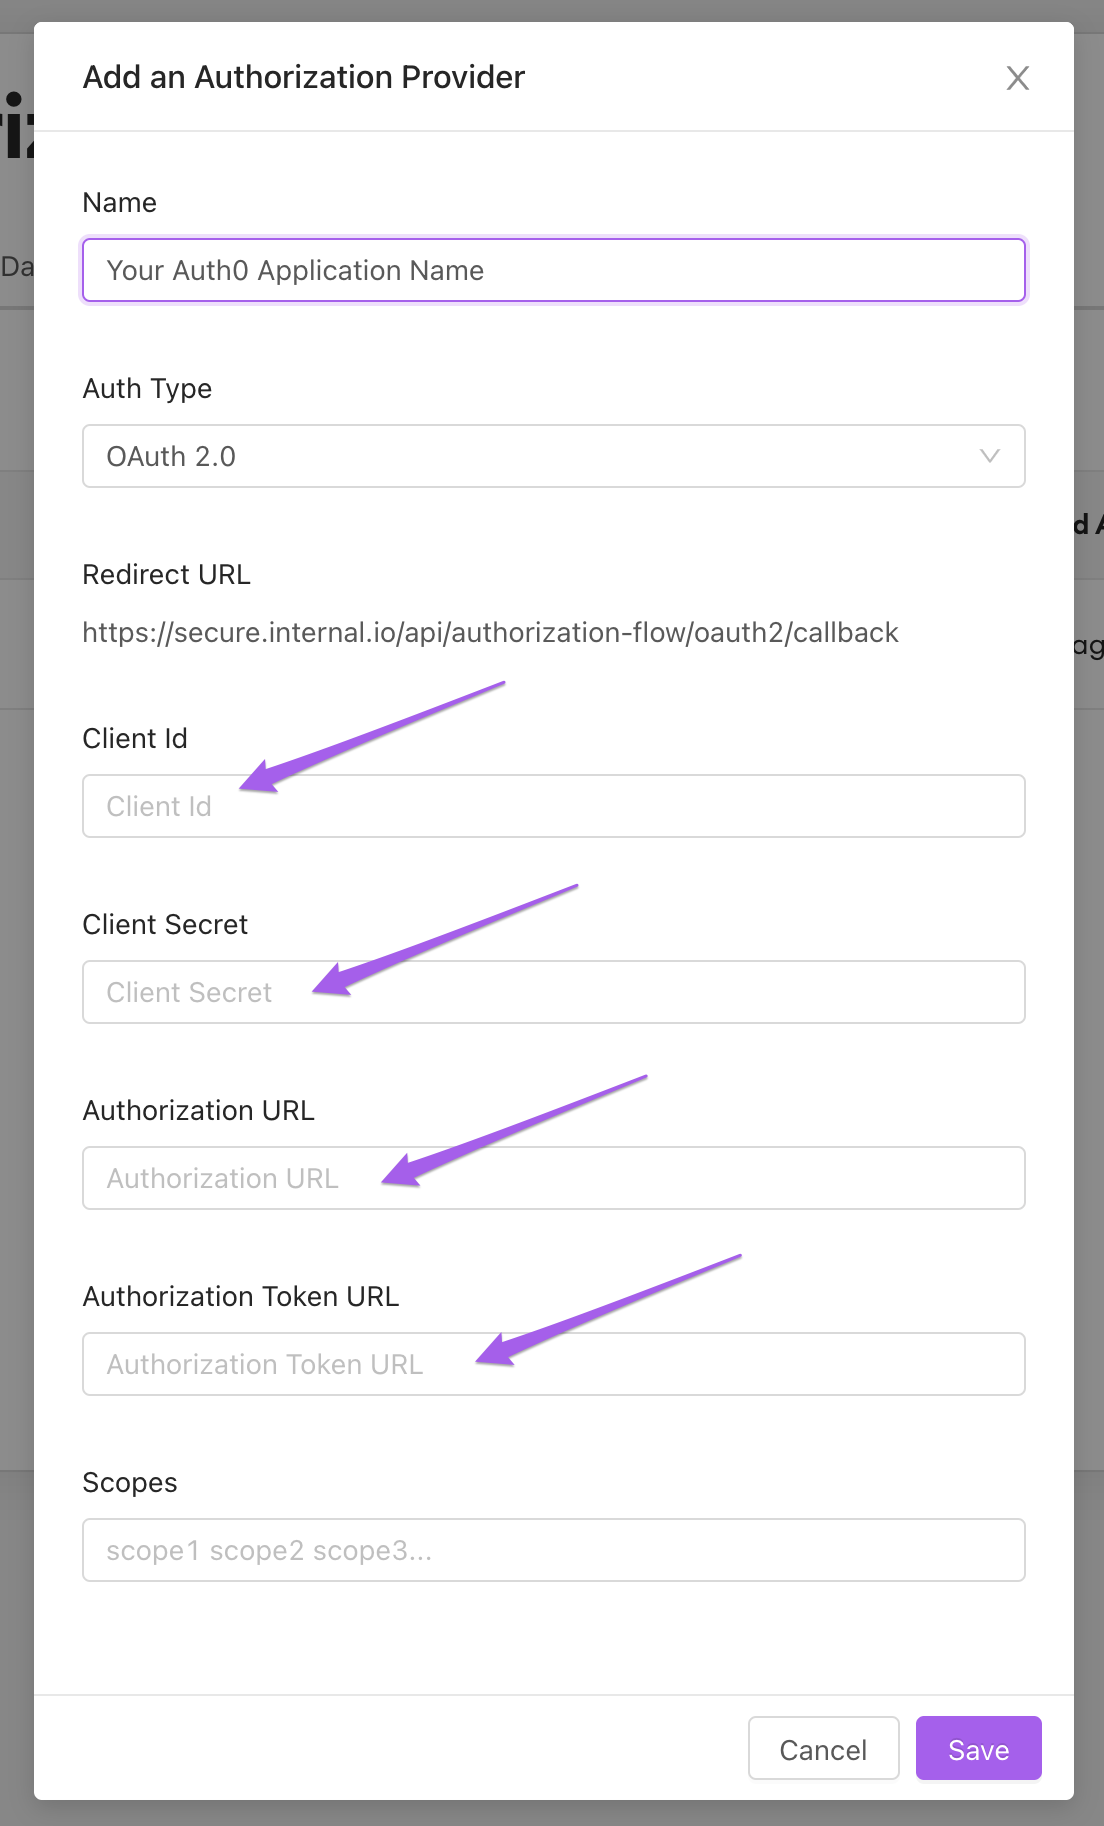
2. Add the Client and Auth0 URL Information to the Provider
Next, add the information we took from your Auth0 application earlier.
3. Scopes (Optional)
Depending on your Auth0 settings and your application settings, you may want to provide scope for the authorization token that we will use with your Internal function. In most cases, your application will have scopes enabled for authorization. It is important in this step to include those scopes or the function may not work.
Note:
"offline_access" is required for automatic token refreshes.
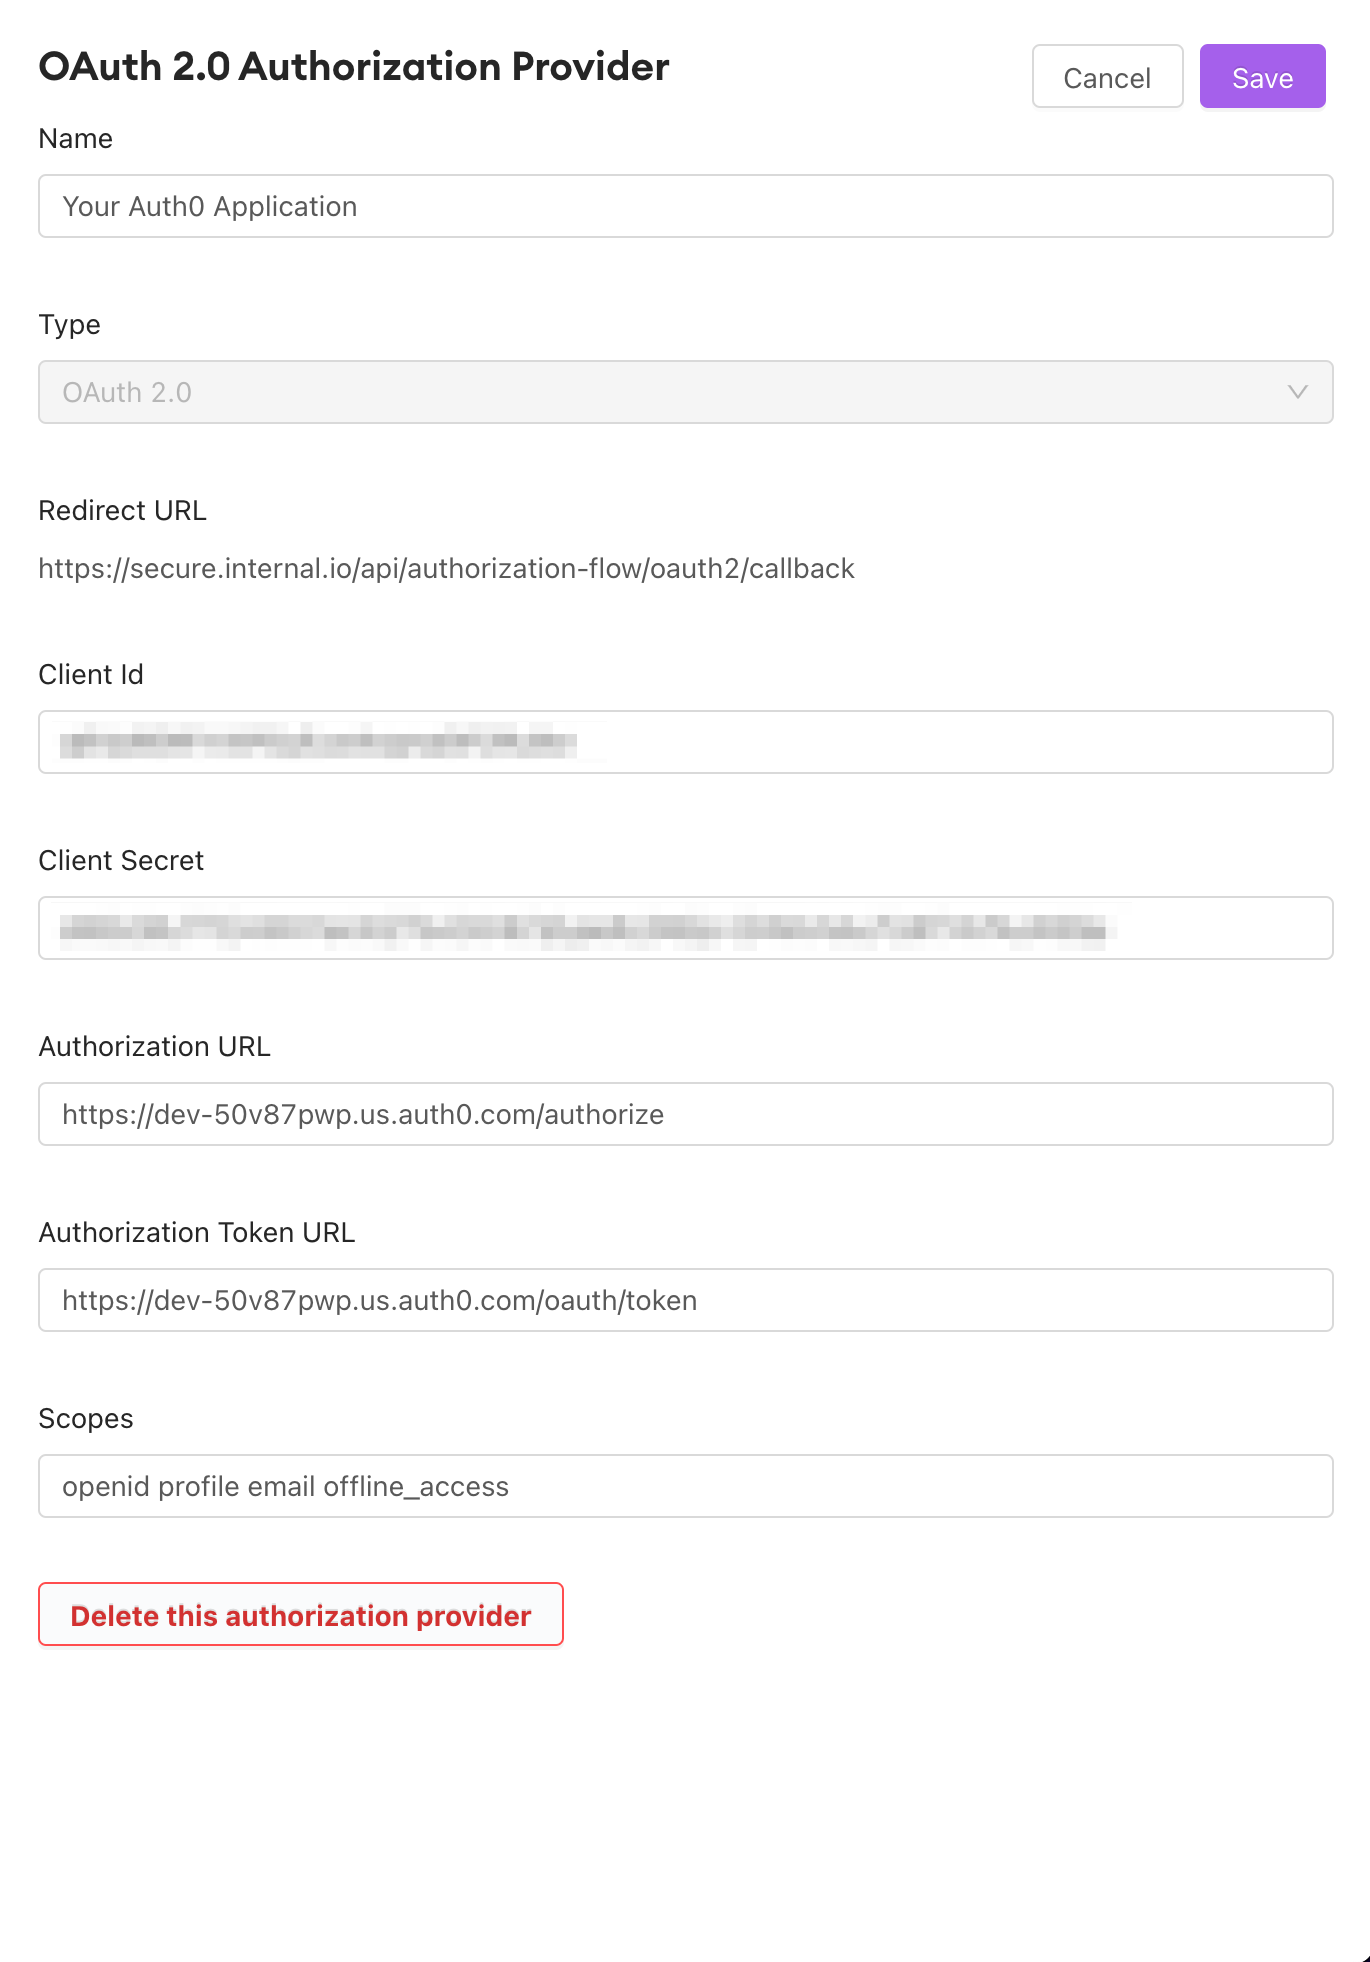
Here, we've defined "offline_access" as one scope for the token. "offline_access" is a scope which allows for the refreshing of access tokens. This scope must be added to the Authorization Provider settings and enabled in Auth0 if you wish to allow token refreshes. This keeps your end users from having to log in repeatedly within a single browser session.
Some very common scopes for OAuth 2.0 are "openid profile email offline_access" Check to ensure which of these scopes your application requires.
If you've no scopes to add -- or you've already added them -- click "Save."
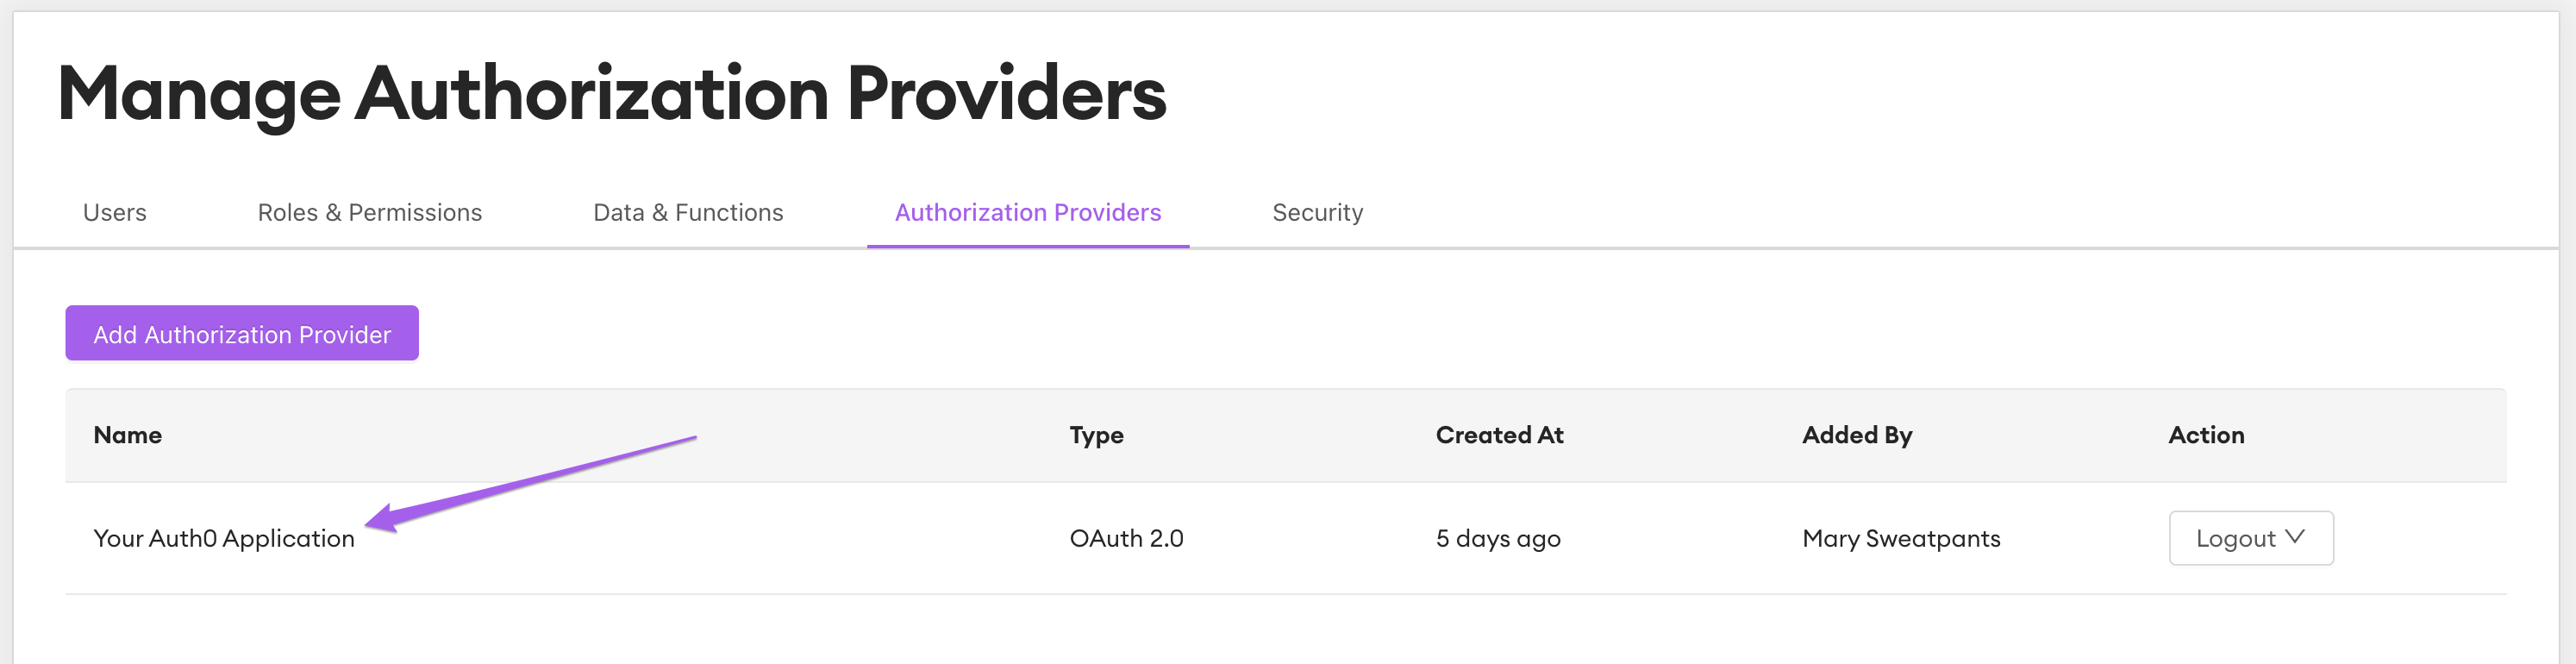
4. Editing the Provider
If you'd like to edit the authorization provider settings, click the application name from the "Authorization Providers" menu and a menu will appear.
Using the Authorization Provider to Secure a Function's Output in a Space
Navigate to the editor for the function whose output you'd like to shield from prying eyes and click the "Auth" tab.
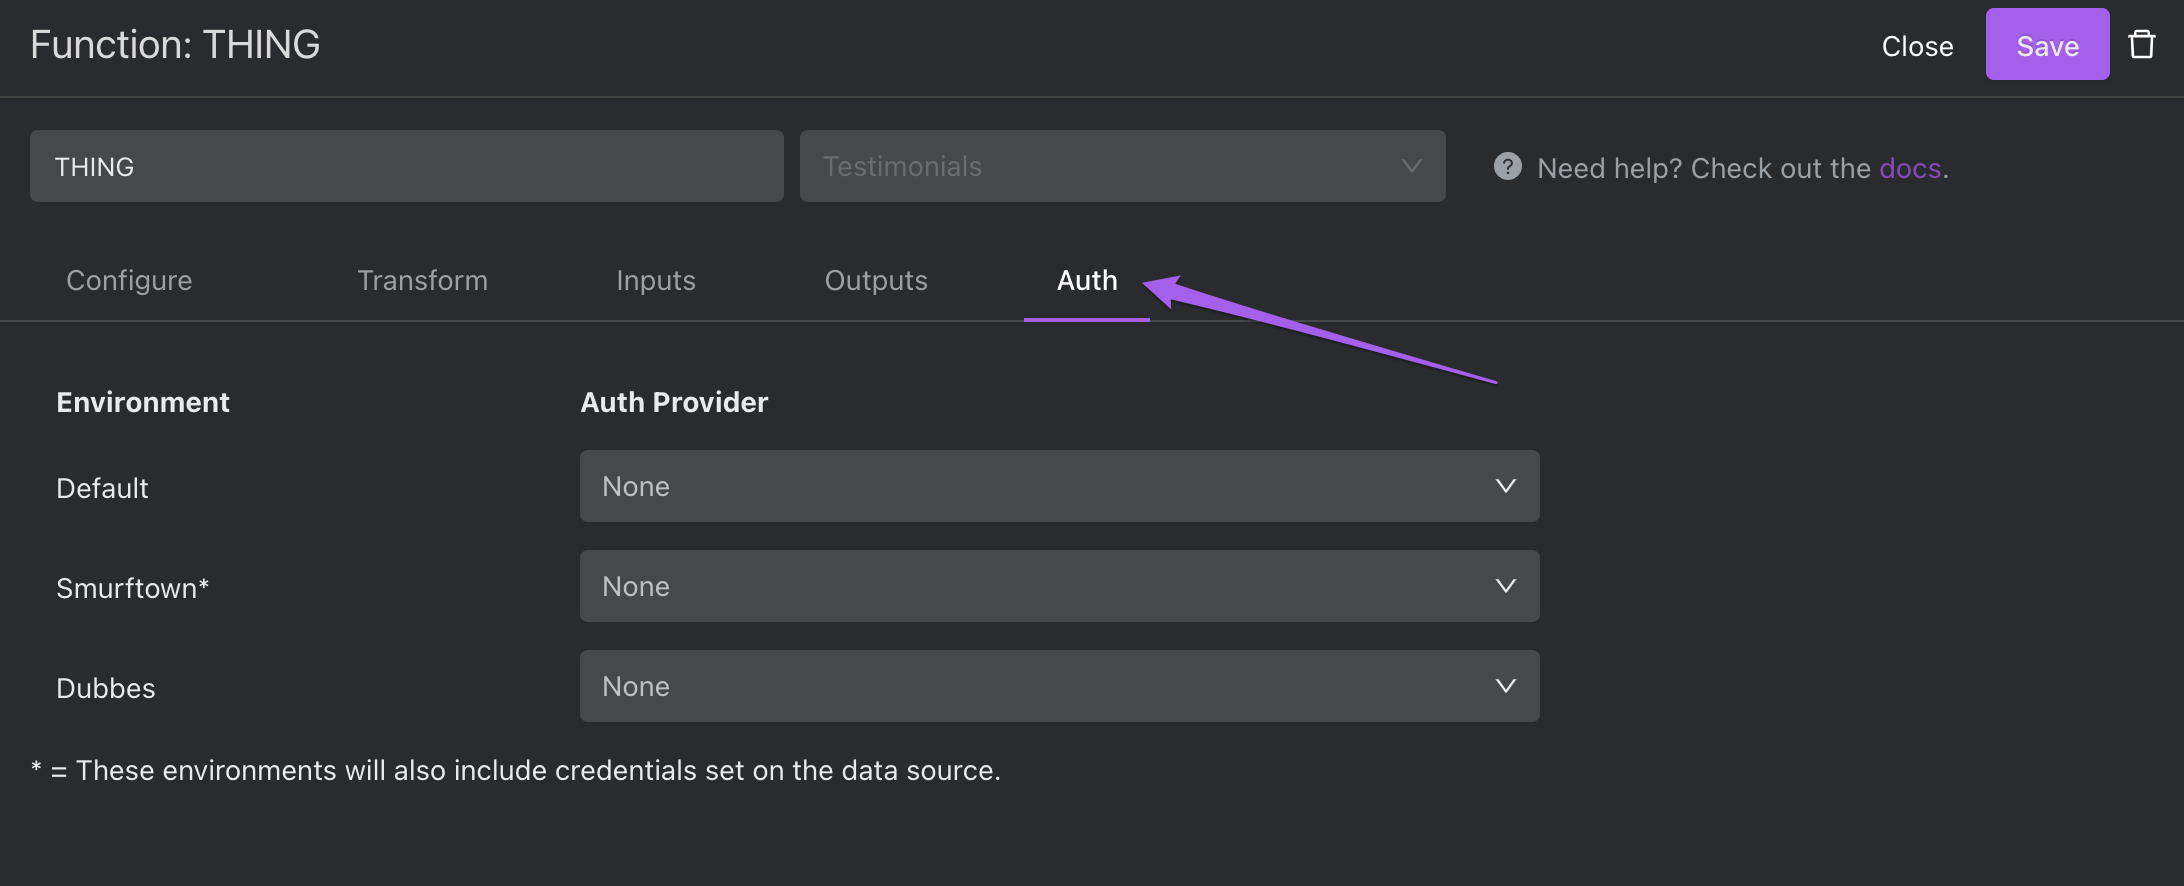
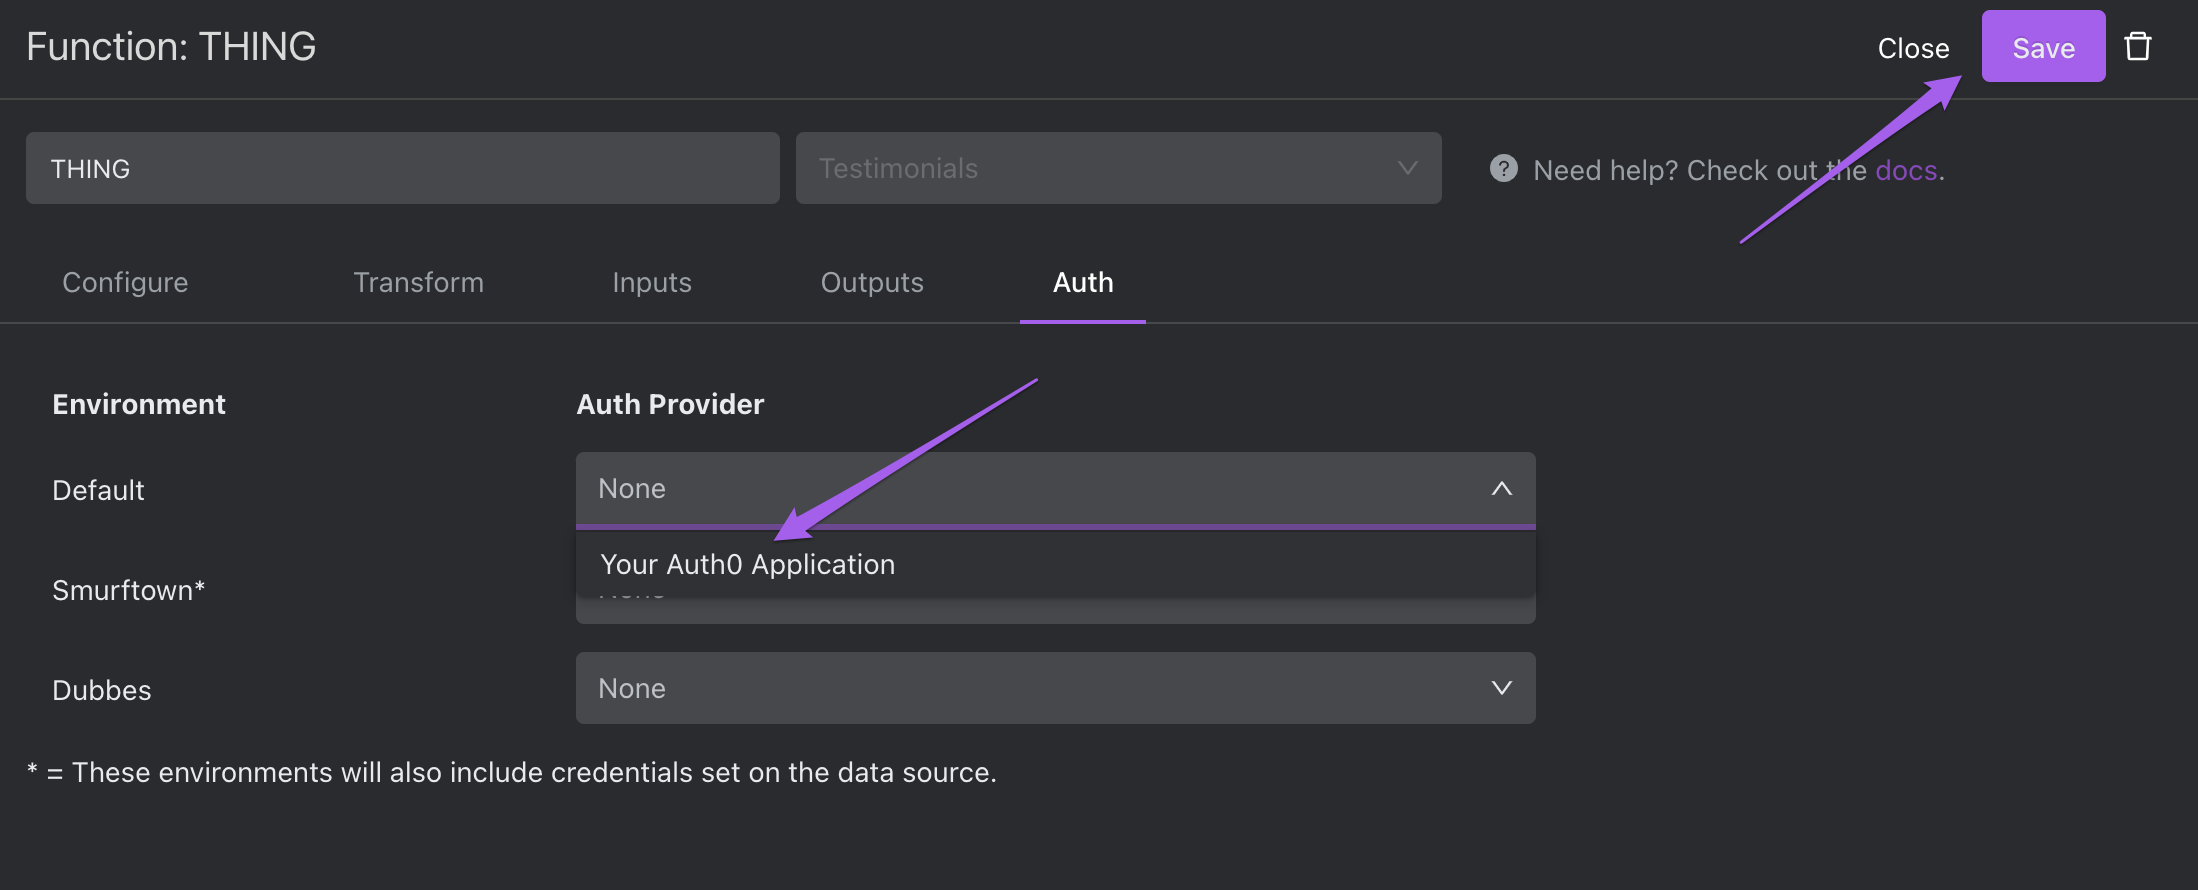
Then, select the dropdown called "Auth Provider" which corresponds to the Environment in which the Space you wish to protect resides.
Click Save.
Navigate to the Space which you're attempting to protect. If you see an authorization CTA, congratulations, you've done it. Your function (and any Space which uses it) is now protected by your Auth0 authorization application!
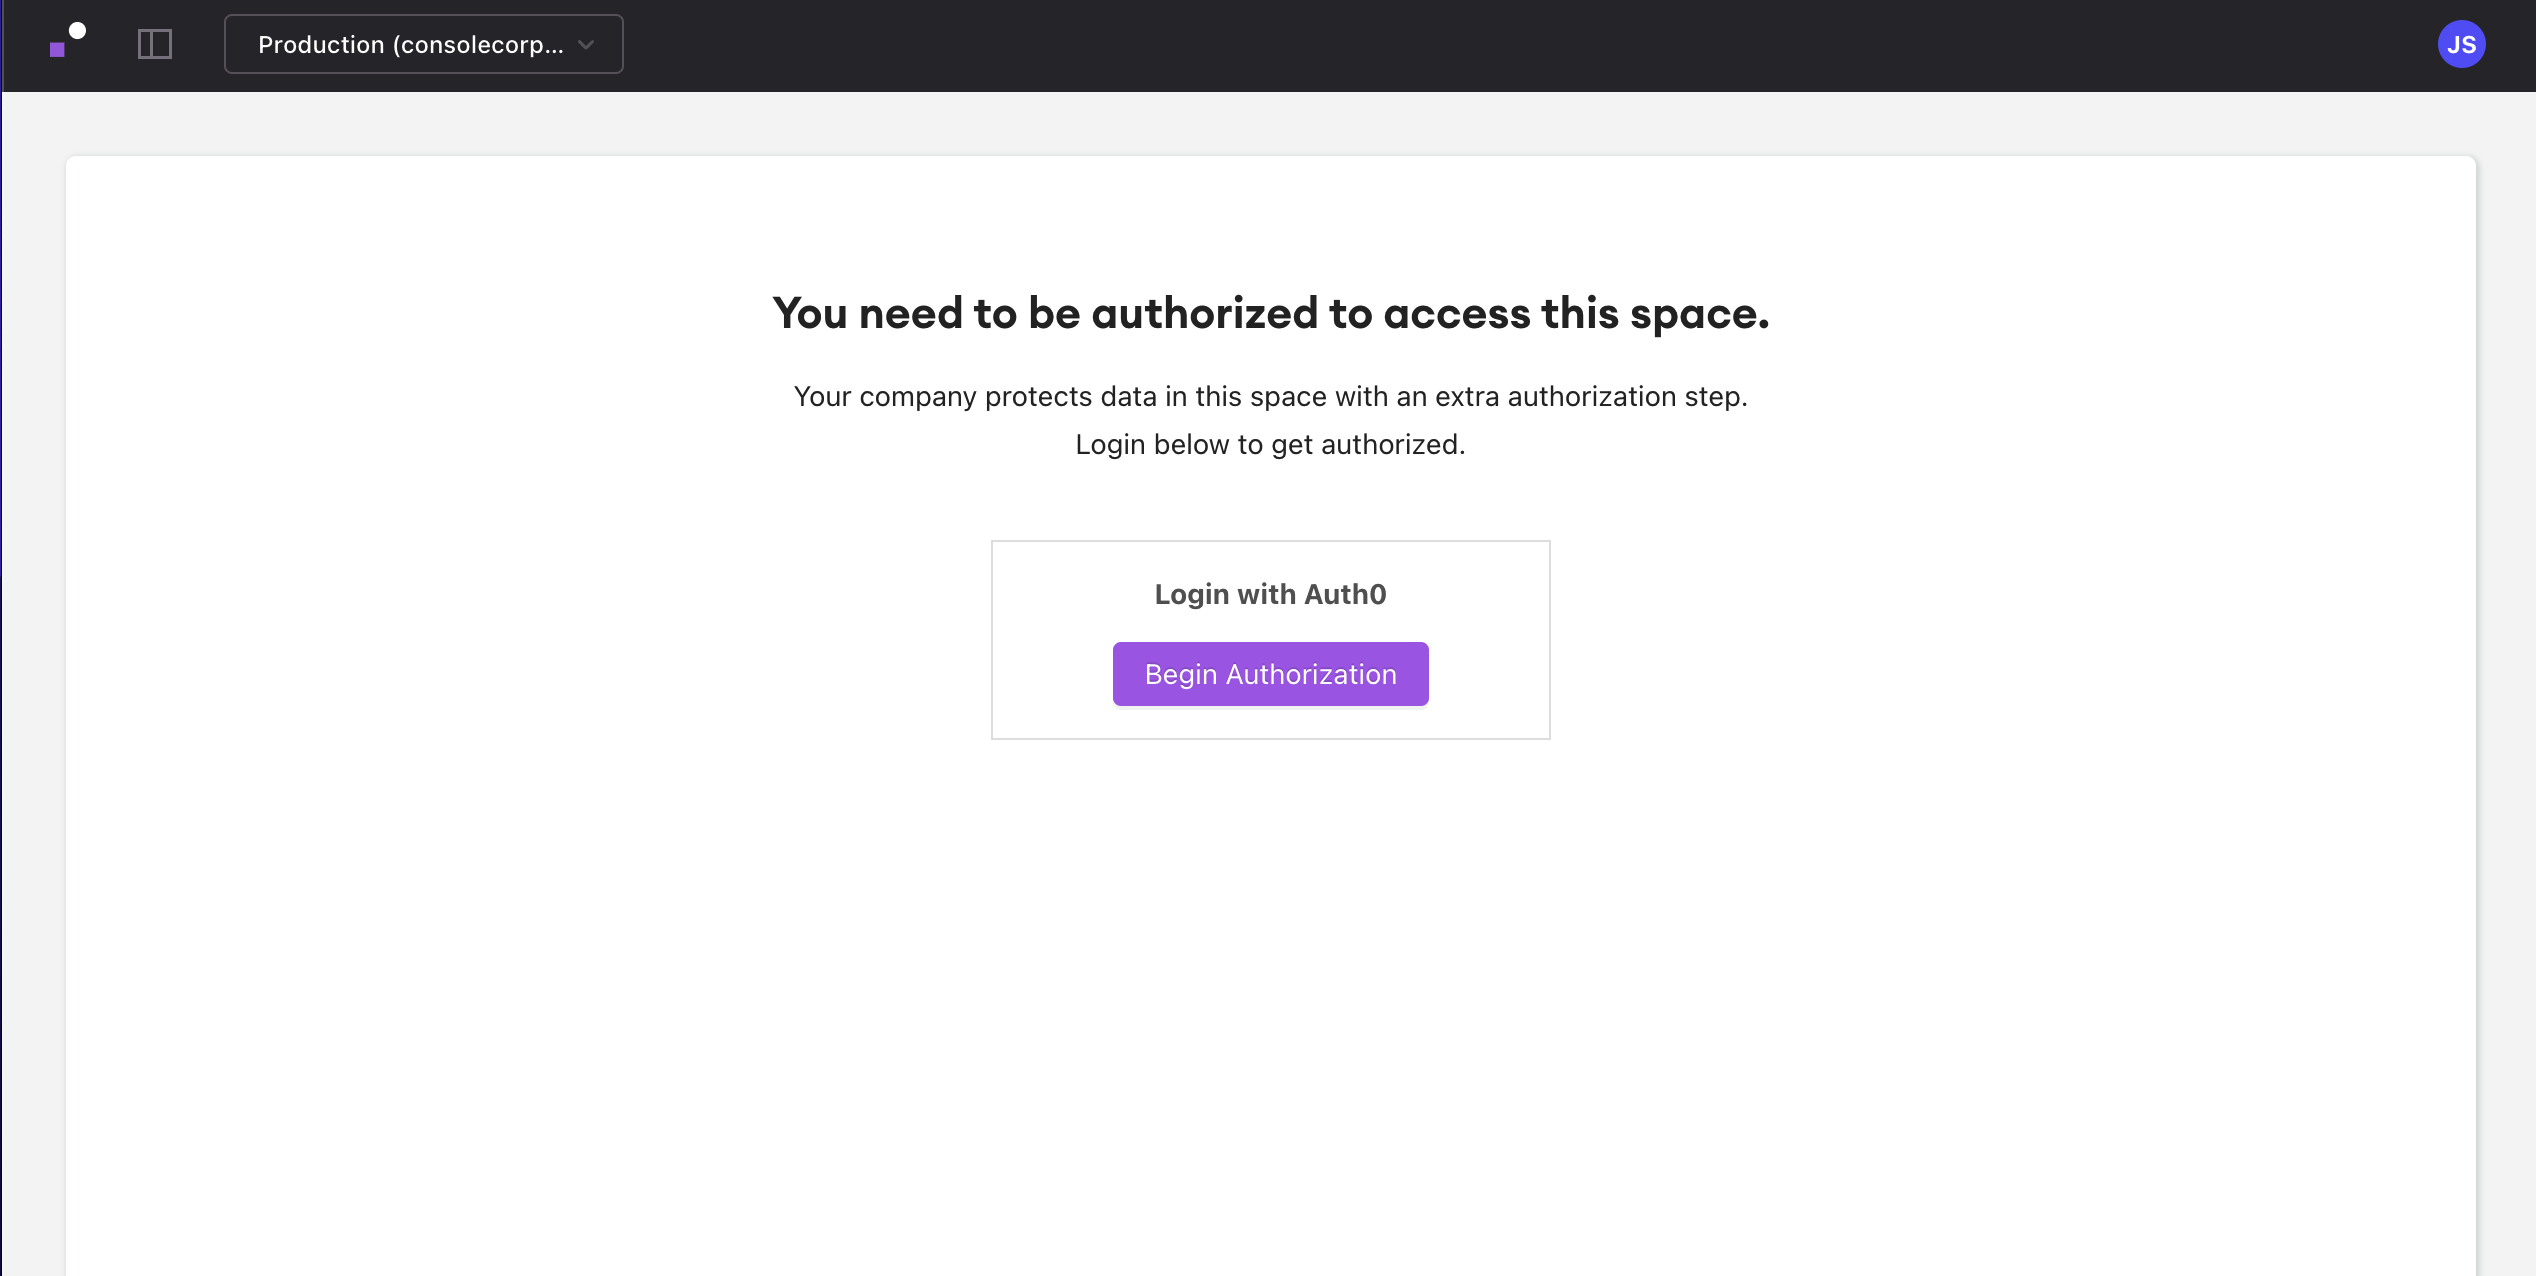
All that remains is to authorize, and the Space will be wholly viewable.
Updated about 1 year ago