
Generic SAML 2.0
Internal Generic SAML 2.0 supports Service Provider (SP)-Initiated Authentication and Identity Provider (IdP)-Initiated Authentication (SSO) flows.
Begin Setting Up SAML 2.0:
- Log in to Internal and navigate to 'Company Settings'
- Select the 'Security' tab
- Select 'Single Sign-On' to open the Single Sign-On drawer.
- From the Single Sign-On drawer, select 'Generic SAML 2.0t' from the drop down.
- Copy the Internal Single Sign-On URL
Configure SAML Provider Settings:
- For the Single Sign-On URL, use the Internal Single Sign-On URL you copied from Internal.
- For the SP Entity ID (also called Service Provider Entity ID), also use the Internal Single Sign-On URL you copied from Internal.
- Leave Default Relaystate blank.
- Set the Name ID format to emailAddress.
- If applicable, set the application username to the user’s email.
- In the Attributes Statements section, map the following Internal attributes to your provider’s equivalent attribute:
- email: The user's email address.
- firstName: The user's first name.
- lastName: The user's last name.
Complete Setup in Internal:
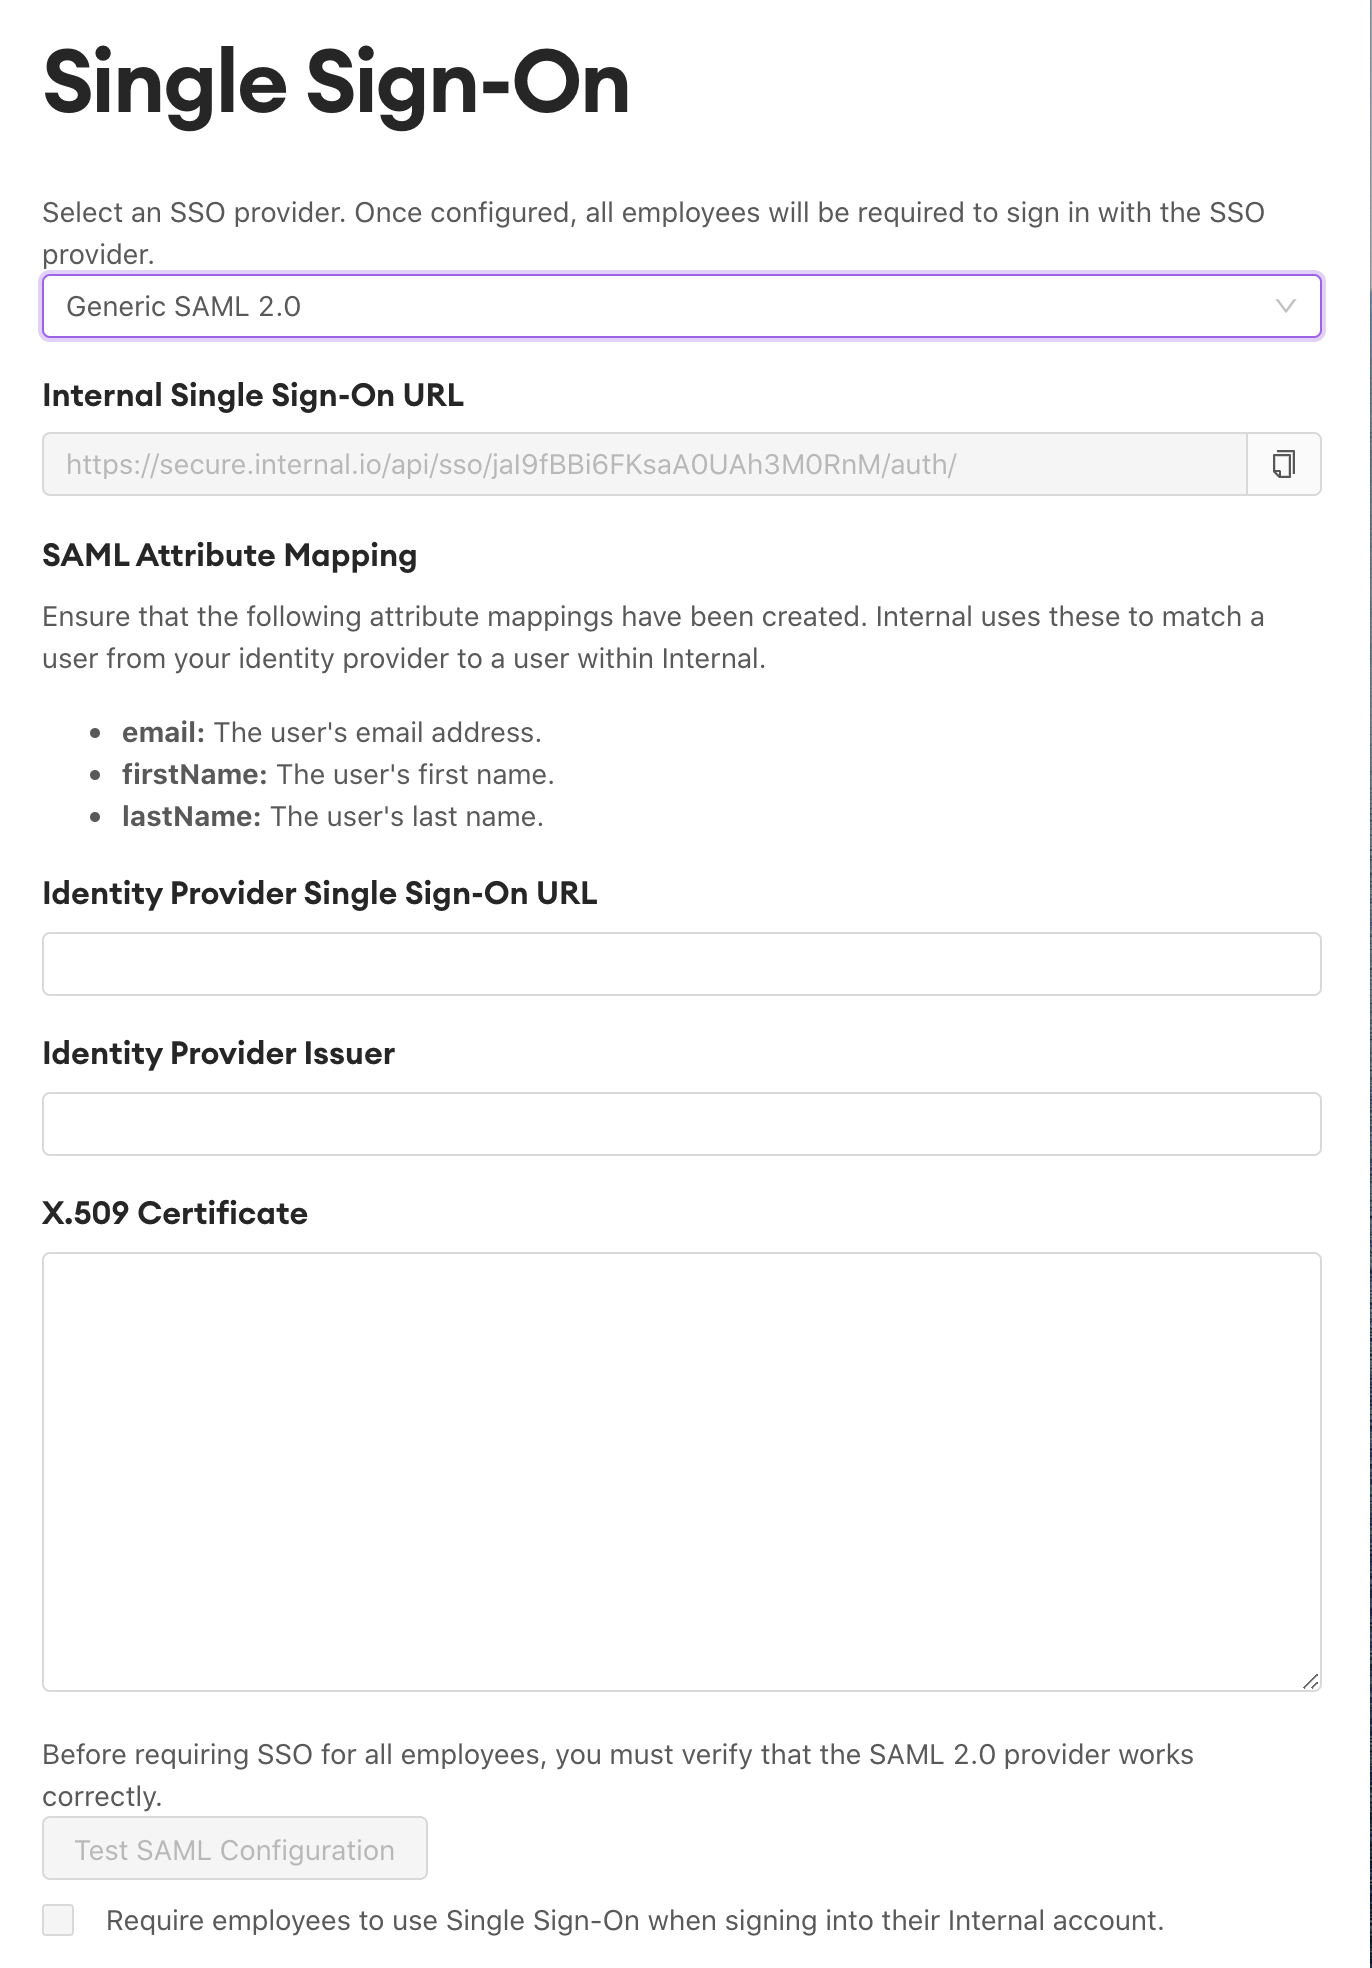
- Enter the Identity Provider Single Sign-On URL from your SAML 2.0 provider.
- Enter the Identity Provider Issuer (also called Entity ID) from your SAML 2.0 provider.
- Enter the X.509 Certificate from your SAML 2.0 provider.
- Save your SSO settings in Internal. Then, re-open the SSO settings and click “Test SAML Configuration” to ensure your SAML 2.0 provider works correctly.
- To enable SSO for all employees, check the checkbox “Require employees to use Single Sign-On when signing into their Internal account”.
Updated about 1 year ago